





Description
Key Technical Specifications
| Parameter | Value |
| Model Designation | PP845 |
| Product ID (Part Number) | 3BSE042236R1 |
| Display Type & Size | TFT-LCD Active Matrix, 12.1-inch diagonal |
| Resolution & Colors | SVGA (800 \times 600 pixels), 64,000 colors |
| Touch Screen Technology | Resistive, analog |
| Processor | Intel XScale PXA270 running at 520 MHz |
| Onboard Memory | 64 MB RAM, 16 MB Flash memory |
| Operating System | Windows CE |
| Ethernet Interface | 1x 10/100 Base-T (RJ45 connector) |
| Serial Interfaces | 3x Serial Ports: COM1 (RS-232), COM2 (RS-422/485), COM3 (RS-232/485) |
| USB Interfaces | 2x USB 2.0 Host (Type A), 1x USB Device (Type B) |
| Input Power Voltage | 24 V DC (18 to 32 V DC range) |
| Current Consumption | Typ 0.8 A at 24 V DC |
| Front Panel Seal | IP65 / NEMA 4 (Dust and splash-resistant when panel-mounted) |
| Cut-out Dimensions | 285 mm (H) x 228 mm (W) |
Product Introduction
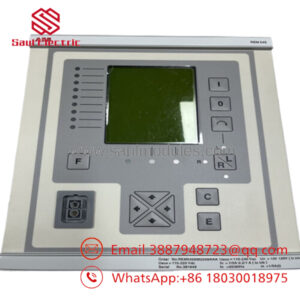
The ABB PP845 (3BSE042236R1) is a 12.1-inch industrial touchscreen operator panel from the legacy Panel 800 series. Designed as the primary visual gateway for local process machinery and control rooms, this high-brightness SVGA display is commonly paired with AC 800M controllers or third-party PLC architectures to deliver real-time system visualization, alarms, trends, and diagnostic monitoring.
Featuring an Intel XScale 520 MHz processor and 64 MB of RAM running on Windows CE, the PP845 handles complex graphical page transitions and intensive serial/Ethernet communication protocols without lag. Its analog-resistive touchscreen is suited for heavy-duty industrial settings where operator interaction occurs while wearing gloves. The IP65-rated front bezel provides industrial-grade sealing against liquid sprays, oil, and dust, ensuring continuous operation on factory and marine decks.
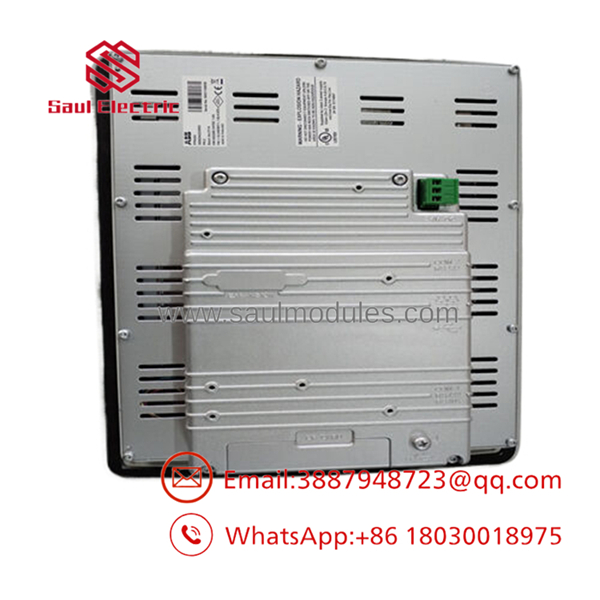
- PP845
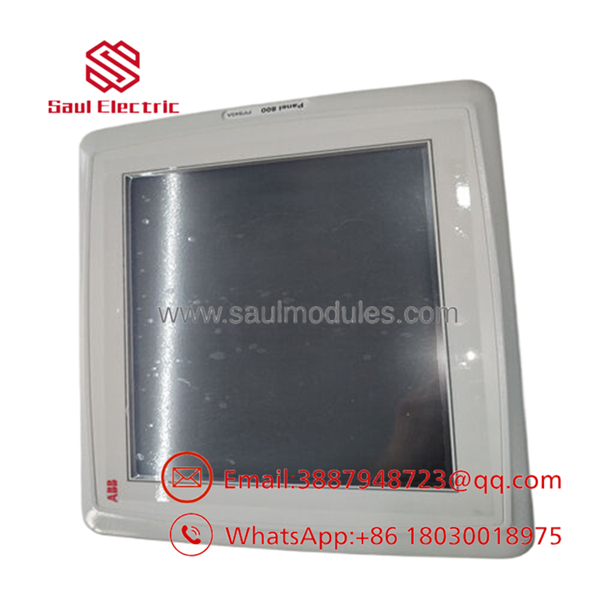
- PP845
Installation & Configuration Guide
Stage 1: Pre-Installation Preparation
- Estimated Time: 15 minutes
- ⚠️ Safety First: Disconnect the primary 24 V DC power supply feed to the panel cutout. Lock out and tag out (LOTO) the circuit breaker before mounting. Ensure the surrounding panel cutout is free from metallic burrs and sharp edges that could compromise the physical front gasket seal.
- Tools Required: ESD wrist strap, panel mounting clamps (included in the original box), PH2 Phillips screwdriver, standard measuring tape, and safety glasses.
- Data Backup: CRITICAL: Before removing the old unit, connect your programming PC to the display using a USB or Ethernet cable and upload the active panel runtime project using the Panel Builder 800 software tool. The configuration is stored on internal flash; if the flash memory is compromised, a backup is required to restore screen graphics.
Stage 2: Removing the Old Module
- Estimated Time: 5 minutes
- Steps:
- Affix your grounded ESD wrist strap to the panel cabinet frame.
- Unplug the 24 V DC power supply connector block from the rear of the unit.
- Disconnect all Ethernet, serial communication (RS-232/RS-485), and USB cables.
- Loosen the physical mounting clamps located around the inner perimeter of the cabinet cutout.
- Gently push the front bezel from the outside to loosen the old gasket adhesive grip, then pull the display out of the cutout panel.
Stage 3: Installing the New Module
- Estimated Time: 15 minutes
- Steps:
- Unbox the replacement PP845 HMI in your ESD-safe workspace.
- Verify that the pre-installed sealing gasket around the inner bezel is properly positioned, smooth, and free of dirt or tears.
- Insert the new panel from the front of the cabinet cutout. Support the weight of the screen until it is securely locked in.
- Working from the back of the cabinet, insert the physical mounting clamps into the slots on the chassis sides. Tighten the screws evenly in a crisscross pattern until the front gasket compresses slightly against the cabinet wall (Do not over-torque, as this can crack the plastic bezel).
- Reconnect all serial (COM1/COM2/COM3) and Ethernet cabling as labeled.
- Self-Checklist:
- [ ] Front bezel gasket compressed evenly to maintain the IP65 seal
- [ ] All mounting clamps secured without over-torque
- [ ] Power wires connected to terminal blocks with correct polarity
Stage 4: Power-On & Testing
- Estimated Time: 15 minutes
- Pre-Power Check: Ensure that the 24 V DC supply lines are properly tightened in the terminal strip and that no copper strands are touching the frame.
- Power-On Steps:
- Turn on the 24 V DC control power breaker.
- Observe the display. The will run its bootloader and display the default system menu or Windows CE desktop environment.
- Access the IP address settings on the HMI’s built-in system screen to match your network baseline.
- Launch Panel Builder 800 on your laptop, establish a connection via Ethernet, and download your backed-up runtime application project.
- Verify communication with the PLC by triggering screen buttons and checking if diagnostic data, alarm messages, and variable values populate correctly.
- ⚠️ Troubleshooting Note: If the touchscreen is unresponsive or misaligned after boot-up, enter the HMI’s integrated service utility screen (tap the screen corner continuously during startup) and run the touch calibration routine.
Frequently Asked Questions (FAQ)
What programming software is used to design screens for the ?
The panel is configured using the Panel Builder 800 software tool (part of the Control IT suite). This utility allows engineers to design graphic screens, configure tags, set up alarms, and establish serial or Ethernet drivers to talk with ABB’s AC 800M, AC 500, or other standard controllers.
Is this legacy panel still supported, and is it genuinely new?
The Panel 800 series (including the ) has transitioned to an obsolete or limited product lifecycle phase. Since the factory has discontinued active mass production of this model, our stock consists of New Surplus (sealed in the original factory box) or Refurbished units that have been thoroughly inspected, repaired, and bench-tested under load to ensure full pixel and touch responsiveness.
What is the direct replacement model if the is completely out of stock?
The modern replacement path is the PP885 (from the Panel 800 2nd Generation series). The PP885 offers a larger, high-resolution widescreen display and improved processor power. Note that switching to the PP885 requires slight modifications to your existing cabinet cutout dimensions and a project migration path within the latest Panel Builder software.
Can the be used in marine environments?
Yes. The is built to meet the vibration, temperature, and electrical isolation standards required for marine classification certifications (such as DNV, GL, and Lloyd’s Register). When mounted correctly with its front gasket sealed against a flush panel cutout, it maintains its IP65 environmental rating, making it suitable for engine rooms and bridge control consoles.
Why is the screen dark even though the 24 V DC power LED is green?
This is typically caused by a failed backlight tube or display inverter card. The LCD backlight has a rated lifespan of approximately 50,000 hours. If the panel is left running with the backlight set to high intensity continuously, the tube will eventually burn out. If the display is dark but you can see faint images when shining a flashlight directly onto the screen, the display requires backlight replacement.

 Start Chat


