





Description
Key Technical Specifications
| Parameter | Value |
| Product Type | Drive Control Unit (BCU-02) |
| Application Platform | ABB ACS880 Multidrives & R8i Inverter Modules (INU) |
| Fiber-Optic Channels | 2 Channels (for controlling up to 2 parallel-connected inverter modules) |
| Auxiliary Supply Voltage | 24 V DC (±10%, max ripple 300 mV pp) |
| Current Consumption | 2.0 A (at 24 V DC, excluding external load options) |
| Memory Interfaces | SD/SDHC card slot (for diagnostic data logging), ZMU removable memory unit |
| Real-time Clock Battery | BR2032 lithium metal button cell |
| Mounting Style | 35 mm DIN rail mount |
| Physical Dimensions | 311 mm x 139 mm x 84 mm (12.2″ x 5.5″ x 3.3″) |
| Net Weight | 1.5 kg (3.31 lbs) |
| Operating Temperature | 0 to +55 °C |
Product Introduction
The ABB BCU-02 (3AUA0000110429) is a specialized, high-performance drive control unit engineered for the ACS880 series of heavy-duty industrial multidrives, particularly parallel-connected R8i inverter modules. It houses the primary control program and processing logic required to synchronize power semiconductors, executing rapid torque and speed algorithms over high-speed optical links.
Equipped with 2 fiber-optic channels, the BCU-02 manages real-time coordination, feedback loop processing, and protective monitoring across dual inverter modules. It acts as the critical brain of the drive system, featuring integrated diagnostic capabilities, an SDHC slot for continuous operational data logging, and compatibility with the ZMU memory unit to enable rapid recovery of application parameters during field replacements.
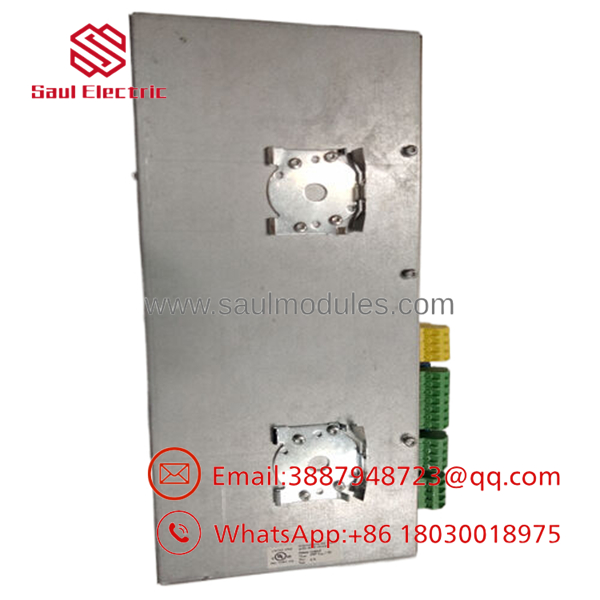
- 3AUA0000110429
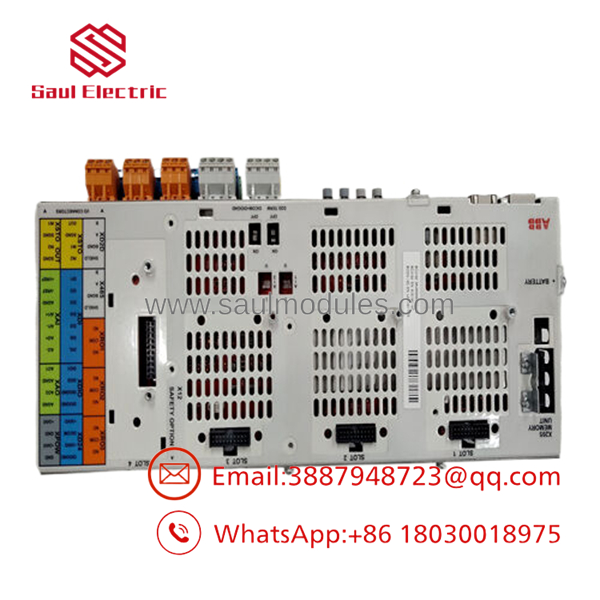
- 3AUA0000110429
Installation & Configuration Guide
Stage 1: Pre-Installation Preparation (Estimated Time: 15 minutes)
- ⚠️ Safety First: Completely isolate the ACS880 drive cabinet from the main AC grid supply. Open the main line contactor or circuit breaker. Wait at least 5 minutes for the internal DC busbar capacitors to fully discharge. Use a reliable multimeter to measure the DC link voltage (UDC+ to UDC-) and verify it has dropped below 50 V DC before starting any physical work.
- Tools Required: Grounded ESD wrist strap, PH2 screwdriver, small flathead screwdriver, digital multimeter, diagnostic computer with Drive Composer Pro.
- Data Backup: If the old BCU-02 is still partially communicative, back up the drive parameters using Drive Composer. Ensure you have the original parameter file (containing drive sizing, motor maps, and custom application programming).
Stage 2: Removing the Old Module (Estimated Time: 10 minutes)
- Verify that the auxiliary 24 V DC control power feeding the unit at the XPOW terminal connector is switched off.
- Put on your grounded ESD wrist strap. Connect the chassis clamp to the unpainted cabinet ground rail.
- Carefully disconnect the fiber-optic cables from the V1 and V2 ports. Note the exact routing direction (TX/RX polarities). Avoid bending fiber-optic cables beyond a minimum bend radius of 35 mm to prevent core fractures. Apply protective dust caps to the fiber connectors immediately.
- Unplug the multi-terminal screw terminal blocks from the front of the BCU.
- Release the plastic mounting latch at the bottom edge of the housing and tilt the BCU unit upward to disengage it from the DIN rail.
Stage 3: Installing the New Module (Estimated Time: 15 minutes)
- Verify the part number on the side of the new unit matches 3AUA0000110429.
- If the replacement kit does not include a pre-loaded memory unit, transfer the existing ZMU memory unit from the side slot of the old BCU-02 to the new unit. This transfer migrates all firmware and system parameters directly.
- Hook the top alignment slots of the new BCU-02 onto the DIN rail, then press the bottom section firmly until the spring latch snaps onto the rail.
- Reconnect the auxiliary control wiring terminal blocks.
- Remove the dust caps and gently insert the fiber-optic plugs into the V1 and V2 ports. Ensure they click securely into their keyed sockets.
Self-Checklist:
- [ ] ZMU memory unit securely inserted into the side slot
- [ ] Fiber-optic connections clean, properly routed, and locked into position
- [ ] Auxiliary 24 V DC power polarity verified at XPOW terminal block
Stage 4: Power-On & Testing (Estimated Time: 20 minutes)
- Apply the 24 V DC auxiliary control power. Do not apply main three-phase line voltage yet.
- Observe the unit’s LED panel:
- Power LED: Solid Green (Control board energized).
- Fault LED: Off. If lit Red, it suggests a missing or corrupt ZMU memory card, or an incompatible firmware version.
- Connect your programming PC to the control panel port or the Ethernet tool interface. Launch Drive Composer.
- Check for active faults. If a “Parameter Restore” or “Inverter Mismatch” fault appears, download the backed-up parameter configuration to the drive.
- Re-apply main line power and run standard diagnostic loop checks before putting the system back in production.
Frequently Asked Questions (FAQ)
Can the (3AUA0000110429) be replaced with a BCU-12 or BCU-22?
Yes. The features 2 fiber-optic channels. In the ACS880 control platform, the BCU-12 (7 channels) and BCU-22 (12 channels) are fully backward-compatible. If you are in an emergency downtime scenario and cannot find a , you can use a BCU-12 or BCU-22 as a drop-in replacement. Simply configure the firmware to match the 2-channel deployment. The unused fiber ports will remain inactive.
Will I lose the drive’s parameter settings and application logic when replacing the unit?
Not if you transfer the ZMU memory unit (the plug-in cartridge containing the drive’s operating firmware and parameters) from the old module to the new one. If the old memory cartridge is damaged, you will need to insert a new ZMU and download the saved parameter file using Drive Composer Pro.
Why does the drive throw an fiber-optic communication fault immediately after installing the new unit?
This is usually caused by reversed fiber-optic links or contaminated connectors. Ensure the receiver (RX) fiber links connect to the respective transmitter (TX) terminals on the inverter end. If the lines are properly connected, use an optical cleaning tool to clear any microscopic dust or debris from the transceiver lenses and fiber tips.
Does this control unit handle the safety functions, such as Safe Torque Off (STO)?
The features dedicated inputs to handle the standard hardwired Safe Torque Off (STO) safety circuit. If your ACS880 drive uses advanced safety functions (such as SS1 or SLS), an optional FSO safety functions module (such as the FSO-12 or FSO-21) must be physically mounted onto the option slots of this control unit.
Why is your surplus pricing more competitive than buying directly from the factory?
We source unused surplus inventory, components from decommissioned automation projects, and canceled industrial packages directly. This strategy allows us to obtain premium, authentic ABB parts at reduced rates. We pass these savings directly to you, providing a cost-effective alternative with minimal lead times compared to standard factory distribution channels.

 Start Chat


