





Description
Key Technical Specifications
| Parameter | Value |
| Model Designation | PP885R |
| Product ID (Part Number) | 3BSE069296R1 |
| Display Size & Aspect Ratio | 15.4 inches (16:10 widescreen format) |
| Display Resolution | WXGA (1280 \times 800 pixels) |
| Display Technology | High-brightness TFT-LCD with dimmable LED backlight |
| Processor | Intel Atom 1.0 GHz |
| Main Memory | 1 GB DDR2 RAM |
| External Flash Storage | 1x SD/SDHC card expansion slot |
| Touch Screen Technology | Industrial-grade analog-resistive touch |
| Interfaces & Ports | Dual Ethernet ports, RS-232, RS-422/RS-485 serial, USB Host |
| Protection Class | IP66 / NEMA 4X (Front panel) |
| Operating Temperature | -30 to +70°C (-22 to +158°F) |
| Vibration Tolerance | High-vibration certified for marine deck/engine mount applications |
| Certifications | CE, UL 508, Marine Approvals (DNV, GL, ABS, LR) |
| Net Weight | 4.70 kg (10.36 lbs) |
Product Introduction
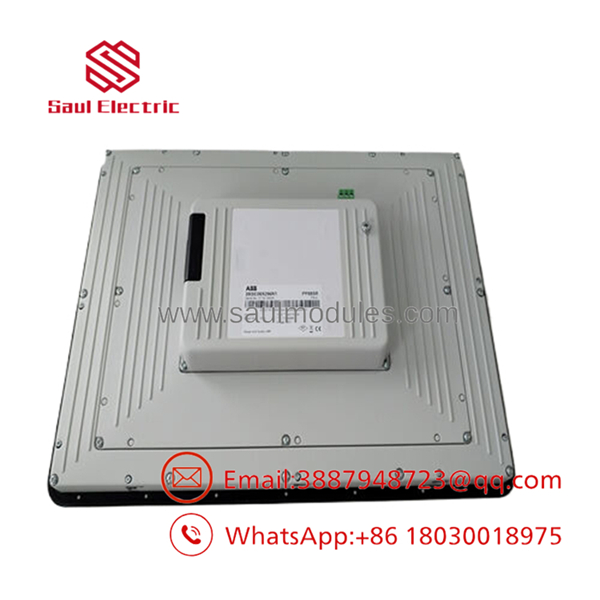
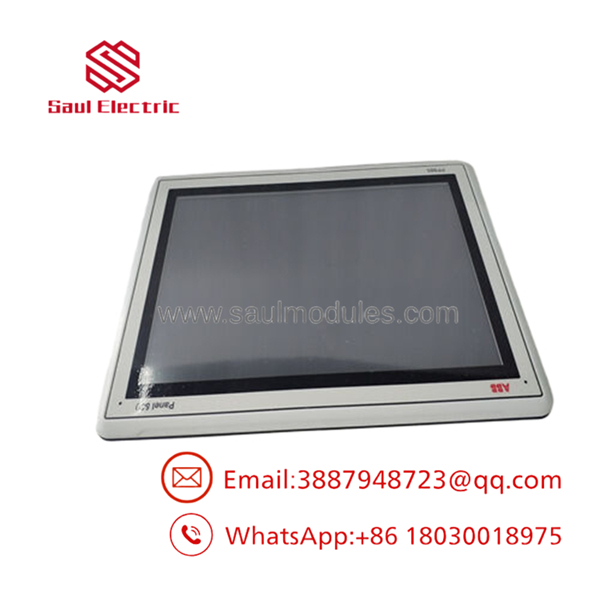
The ABB PP885R (3BSE069296R1) is a highly robust, 15.4-inch widescreen industrial touchscreen HMI belonging to the “Rugged” and Marine certified category within the Panel 800 (Version 6) family. Unlike standard commercial-grade HMIs, the PP885R is designed from the ground up to operate in punishing conditions—from offshore vessels and open marine bridges to dusty heavy-industrial manufacturing floors.
Encased in a powder-coated, lightweight die-cast aluminum housing, the front of the screen carries a stringent IP66 (NEMA 4X) ingress rating. It is equipped with a high-brightness, sunlight-readable TFT display that features a fully dimmable backlight to accommodate variable ambient lighting conditions (essential for night navigation on vessel bridges). Under the hood, a 1.0 GHz Intel Atom processor paired with 1 GB of RAM delivers high performance for complex graphics processing, alarms, historical trending, and multi-protocol control network handshakes.
Installation & Configuration Guide
Stage 1: Pre-Installation Preparation
- Estimated Time: 20 minutes
- ⚠️ Safety First: Isolate the target 24 V DC feed line before cutting console panels or inserting hardware. Verify that alternative safety indicators are running if you are taking down an active monitoring node.
- Tools Required: Jigsaw/panel cutout tools, file/deburring tool, ESD wrist strap, metric socket set, PH2 screwdriver, digital multimeter.
- Front Shielding: Because of its usage in marine environments, it is highly recommended to install the optional RX885 Touch Protective Cover to safeguard the front glass face against chemical sprays or deep physical abrasions.
Stage 2: Removing the Old Module
- Estimated Time: 10 minutes
- Steps:
- Secure your grounded anti-static wrist strap to a clean structural grounding bar.
- Switch off the DC circuit breaker and disconnect the terminal block plug from the back of the panel.
- Disconnect all interface links (Ethernet, serial COM lines, ground cables, and external USB expansion plugs).
- Working from the rear of the mounting console, remove the retaining panel clamps using an appropriate driver socket.
- Gently ease the front bezel out of the cutout, ensuring the structural backing gasket does not stick or tear against the panel margin.
Stage 3: Installing the New Module
- Estimated Time: 20 minutes
- Steps:
- Clean the outer mounting lip of the panel cutout to remove any dirt, residual adhesive, or metallic filings.
- Fit the new sealing gasket around the inner lip of the PP885R housing. Ensure it is completely flat and not twisted.
- Align the PP885R with the cutout (385 mm \times 261 mm default cutout profile) and slide the assembly into place from the front of the console.
- From the inside of the cabinet, insert the mounting bracket fingers into the slots on the aluminum housing sides. Tighten the screws in a balanced cross-pattern. Compress the gasket evenly to lock in the IP66 seal.
- Secure the structural earth/ground wire of the panel chassis directly to your console common earthing rail.
- Self-Checklist:
- [ ] Panel cut matches target dimensional specs
- [ ] Bezel gasket seated evenly without pinches or gaps
- [ ] Chassis ground strap bolted tight
Stage 4: Power-On & Testing
- Estimated Time: 15 minutes
- Pre-Power Check: Verify the DC source voltage reads between +18 V DC and +32 V DC, and ensure correct terminal polarity.
- Power-On Steps:
- Energize the 24 V DC power circuit.
- The panel will launch its onboard bootloader diagnostics. Confirm that the display lights up evenly and that no pixel anomalies are present.
- Hook up your laptop containing the Panel Builder 800 (Version 6) engineering package.
- Load the network configuration parameters and assign the target IP/subnet values to the Ethernet card ports.
- Download the runtime application file and verify communication loops with your AC 800M controller or auxiliary system PLCs.
- ⚠️ Troubleshooting Note: If the touchscreen does not register presses precisely after initial configuration, enter the bootup service menu (typically triggered by holding down a corner quadrant of the screen as power is applied) and execute the touchscreen calibration routine.
- PP885R
Frequently Asked Questions (FAQ)
What makes the different from the standard PP885?
The standard PP885 is optimized for typical indoor control room cabinets, featuring a narrower temperature profile and a standard IP65-rated plastic front bezel. The features a die-cast, powder-coated aluminum housing, a wider operating temperature window of -30 to +70°C, a high-brightness dimmable panel for direct sunlight visibility, and marine certifications (DNV, GL, LR) suitable for deck mounting.
Can the operate in high-vibration engine rooms?
Yes. The is designed and tested to withstand the sustained high-frequency mechanical vibration typical of ship engine rooms and propulsion compartments. The solid-state design (no rotating platter hard drives or physical cooling fans) prevents mechanical wear under constant vibration.
Does the have multi-protocol support for non-ABB controllers?
Yes. Like all Panel 800 devices, the is built on a highly open software architecture running under the .NET framework. It contains a library of over 50 built-in protocol drivers, allowing it to interface simultaneously with ABB systems and third-party PLCs (including Rockwell Automation/Allen-Bradley, Siemens, Schneider Electric, and Modbus TCP/RTU architectures).
Why is a dimmable backlight considered a safety feature in marine setups?
On a ship’s bridge during night navigation, bright displays can compromise the night vision of the helm crew. The features a dimmable LED backlight that can be turned down to near-zero brightness. This allows operators to read active telemetry screens without creating glare inside the wheelhouse.
Can I load my legacy Panel Builder 800 version 5 projects onto the ?
The requires Panel Builder 800 Version 6 (or newer) for hardware target mapping and compile generation. To use a legacy v5 application, open your original project in Panel Builder Version 6, perform a hardware conversion to map the old panel layout to the new resolution, verify the screen layout ratios, and recompile.

 Start Chat


