





Description
Key Technical Specifications
| Parameter | Value |
|---|---|
| Microprocessor Architecture | Intel Celeron M running at 1 GHz clock speed |
| User Program Memory | 20 MB battery-backed volatile RAM |
| Non-Volatile Flash Storage | 20 MB internal NAND flash memory |
| Integrated Communication Interfaces | 1 x RS-232 port (RJ-11), 1 x isolated RS-485 port (15-pin D-sub) |
| Supported Core Protocols | Modbus RTU Slave, SNP, Serial I/O, Modbus Master (via block calls) |
| Maximum Discrete I/O Capacity | 32,768 Inputs (%I) and 32,768 Outputs (%Q) |
| Maximum Analog I/O Capacity | 32,768 Inputs (%AI) and 32,768 Outputs (%AQ) |
| Backplane Physical Bus Support | Dual-bus support: PCI (high-speed) and serial (legacy) backplanes |
| Current Consumption | 1.25 A from 5 V DC rail; 1.0 A from 3.3 V DC rail |
| Real-Time Clock Accuracy | ±2 seconds per day at 0 to +60 °C operational thresholds |
Product Introduction
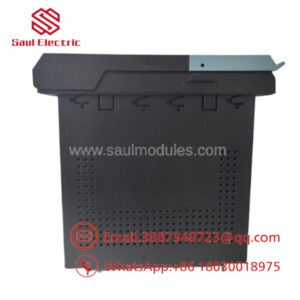
The GE IC695CPU315 is a high-density 1 GHz Intel Celeron M processor module engineered for the PACSystems RX3i Programmable Automation Controller (PAC) architecture. Featuring an expansive 20 MB user memory block shared across logic variables and system configuration tags, this single-slot CPU handles highly complex, calculation-heavy operations in demanding industries like water treatment, oil and gas, and power generation.
Unlike legacy controllers, the IC695CPU315 utilizes an open-architecture PCI Express backplane layout, enabling deterministic sub-millisecond data distribution to high-speed I/O configurations. It natively supports multi-language programming environments—including Ladder Diagram (LD), Structured Text (ST), and C blocks—allowing engineering teams to execute sophisticated control logic while retaining dual-bus support for legacy Series 90-30 modules.
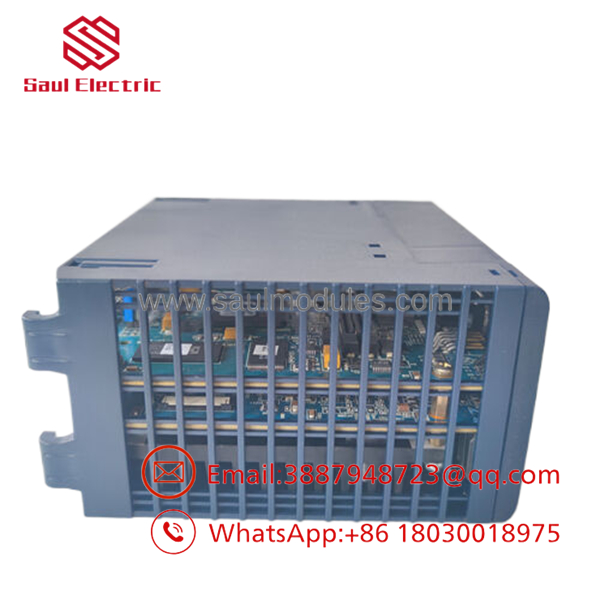
- IC695CPU315
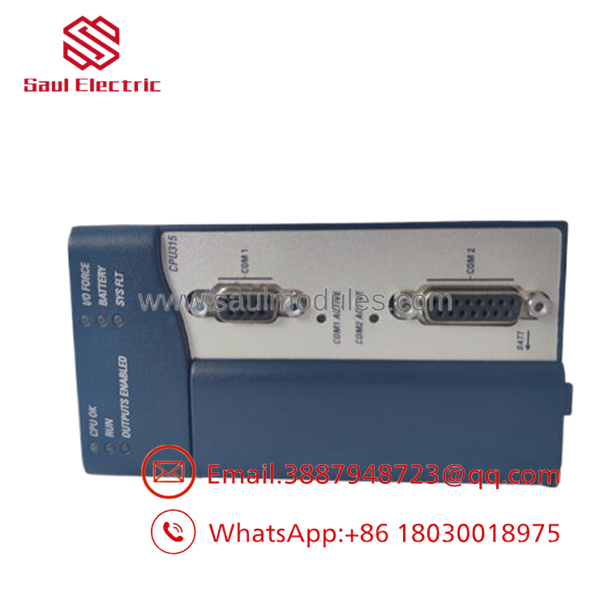
- IC695CPU315
Installation & Configuration Guide
Stage 1: Pre-Installation Preparation (Estimated Time: 15 minutes)
- ⚠️ Safety First: Shut off and lock out the main power source supplying the RX3i rack housing panel. Attempting insertion while the PCI backplane rail carries live power can permanently fry the CPU edge contacts or scramble configuration sectors on neighboring modules.
- Tools Required: Grounded ESD wrist strap, anti-static safety workbench pad, and a PC running Proficy Machine Edition V5.50 or higher.
- Data Backup: Connect your programming laptop to the active CPU. Perform a full target verification backup, pulling the project logic, hardware properties, and register values (%R) to a safe directory.
Stage 2: Removing the Old CPU (Estimated Time: 5 minutes)
- Clamp your ESD wrist strap to a verified bare-metal frame ground terminal within the enclosure chassis.
- Disconnect any front-panel serial cables linked to the RJ-11 port or the 15-pin D-sub port.
- Loosen the upper and lower faceplate retaining screws on the controller framework.
- Squeeze the top and bottom plastic chassis levers to release the internal latch hooks.
- ⚠️ Note: Pull the module straight out of the slot along the guide tracks to avoid twisting the multi-pin backplane array connector. Secure the unit immediately in an ESD-safe bag.
Stage 3: Installing the New CPU (Estimated Time: 10 minutes)
- Extract the new IC695CPU315 from its static-shielding wrap while positioned on your grounded anti-static mat.
- Hardware Revision Check: Confirm that any physical battery connection links on the side profile are engaged to enable memory retention.
- Slide the CPU card evenly into the designated slot of the Universal Backplane (IC695CHS007/012/016). Note that the RX3i CPU typically seats in slots 1 or 2.
- Press firmly on the top and bottom corners of the faceplate until the unit snaps flush into the backplane connector socket.
- Hand-tighten the upper and lower faceplate retaining screws to lock down ground continuity.
Stage 4: Power-On & Project Loading (Estimated Time: 15 minutes)
- Turn on the main RX3i power supply module breaker.
- Monitor the LED status progression. The PWR and OK lights must illuminate solid green. If the FAULT or DIAG LEDs flash red, refer to the diagnostic buffer.
- Connect your PC via an RS-232/RJ-11 serial cable or over an adjacent Ethernet module link.
- Launch Proficy Machine Edition, go online with the target controller, and perform a memory clear step on the new card.
- Download your archived project profile and transition the software state into RUN mode.
- ⚠️ Troubleshooting Note: If the software shows an “I/O Configuration Mismatch” or a “Major Fault” occurs upon transitioning to run mode, open the Hardware Configuration tree in Proficy. Verify that the hardware revision suffix code matches the precise module version installed in the physical rack slot.
Frequently Asked Questions (FAQ)
What software version is required to program the IC695CPU315?
The PACSystems RX3i requires GE/Emerson Proficy Machine Edition (PME) version 5.50 or higher. It is highly recommended to use PME version 8.60 or later to ensure complete diagnostic functionality and proper mapping of memory block configurations. Always check that the hardware catalog version selected in your software matches your physical hardware revision.
Where does the program logic reside if the backup battery fails?
The CPU uses volatile RAM for daily execution, which requires an active battery link to preserve variables during power outages. To prevent code loss from a dead battery, you can use the PME software utility to burn your verified program directly into the 20 MB non-volatile NAND Flash memory area. Once flashed, the controller will automatically reload its program logic from flash storage upon reboot, even if the battery is fully depleted.
Can I plug this CPU into an older Series 90-30 rack system?
No. The requires a PACSystems RX3i Universal Backplane (such as the IC695CHS012), which features a high-speed PCI Express bus layout. It cannot be mounted into a legacy Series 90-30 rack chassis. However, the RX3i Universal Backplane does include a legacy serial bus route alongside the PCI bus, allowing you to use your existing Series 90-30 I/O modules in the same rack as this newer CPU.
What is the function of the toggle switch behind the front door panel?
The front three-position run mode toggle switch provides direct manual control over the processor’s execution state. The top position forces the unit into Run with Outputs Enabled, the middle position places it in Run with Outputs Disabled, and the bottom position shifts the controller into Stop mode. This physical keyswitch configuration can be overridden or disabled within your software hardware parameters if you require remote control via your HMI console.
Since Emerson has updated the RX3i family with newer CPUs, what is the status of this stock?
This component is available as a New Original / New Surplus item sourced from clean, climate-controlled spare parts reserves and canceled integration projects. While newer processing cards like the IC695CPE305/CPE310 have been introduced, the CPU315 remains a primary workhorse for plants running established RX3i control strategies. We run comprehensive backplane communication tests and RAM diagnostics to guarantee out-of-box reliability, and we back this module with a full 1-year operational warranty.


 Start Chat


